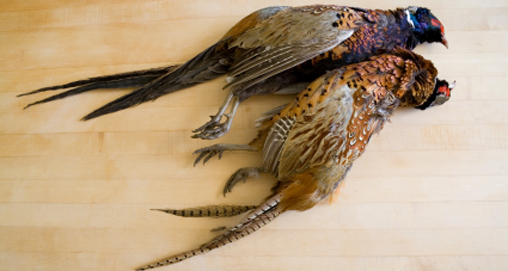
Bird hunting season is upon us and there’s nothing I like more than a wild bird at the dinner table, especially during the holidays. Preparing wild birds after the hunt can sometimes be tricky, so here are a few of my handy tips to simplify the process.
In the field…
Field treatment of game birds is crucial, especially if you plan to age them. Get the birds out of the game pocket as soon as possible, and keep them separate, cool and dry. Hang them by the neck or feet with a game strap in a cold but not freezing place. If the weather is very warm, pluck the birds around the area where you gut them, then remove the intestines. Try to avoid this, however, since birds are best aged with the intestines intact. Instead, have an ice chest ready with a shelf arranged on top, and lay the birds on top until you get home.
On aging…
Jean Anthelme Brillat-Savarin wrote that, “Above all feathered game should come the pheasant, but once again few mortal men know how to present it best. A pheasant eaten within a week after its death is more worthless than a pullet, because its real merit comes in its heightening flavor.”
The beautiful taste of a well-aged animal came by virtue of necessity. Refrigeration wasn’t available until the 20th century, which meant that people learned to enjoy game birds whose breast meat was aged until green. But as my friend, the British gamekeeper once pointed out, people don’t like their food “high” anymore. Their taste buds are no longer suited to it since the arival of refrigeration.
Certain game birds today, however, when relatively undamaged by shot, left in their feathers with intestines in tact, and aged for a period of time, are much better tasting. Age the meat, hanging whole by the neck with the feathers and skin on and the guts intact at a temperature in the range of 50 to 55 degrees F. Pheasants are best if eaten as soon as the aging is completed.
Three to four days is best for a smaller bird, five to seven days for a larger/older one. If the bird is damaged, pluck and gut it and place it on a wire rack over a pan in the refrigerator, covered in a wet cloth to prevent drying.
On plucking a bird…
Plucking a bird is time consuming, the most time-consuming part of the process. But there are few things more elegant on a dinner table than a whole bird. You have to do it a few feathers at a time, plucking with one hand while using the other hand to secure the skin, in order to prevent it from tearing. For ducks that you aren’t planning to age, I find it is most easily done within an hour of when they are killed, or while you are sitting and waiting for more in the duck blind. Mechanical pluckers rarely work, especially with thin-skinned birds like pheasants. Dunking the bird in scalding water (wet-plucking) works but keep in mind that doing so will semi-cook the skin.
I prefer dry plucking, especially because I age my birds. This simply means, start plucking. If you need extra assistance for the fine feathers, dipping the bird in paraffin wax at the end and peeling the wax off works best. So does using a torch to singe the remaining down. The larger feathers can be saved for fly-fishing or decorating. You should only grab a few feathers at a time and be particularly gentle around the areas with loose skin (neck and base of the wing), as they will tear most easily. Quill feathers are the most difficult to remove without tearing the skin. They should be plucked one at a time with a quick snap of the wrist, while holding the skin down with the other hand. Sometimes tweezers are helpful.
In Part 2, I’ll share the steps I take for skinning, breasting, butchering and trussing game birds. In the meantime, do you have any handy tips to share?


